
Introduction
You set the bench to incline and press, and the next morning the soreness sits in the front of your shoulders—not across the top of your chest. That usually comes down to two things: the incline bench press angle you picked, and whether your bench actually offers it.
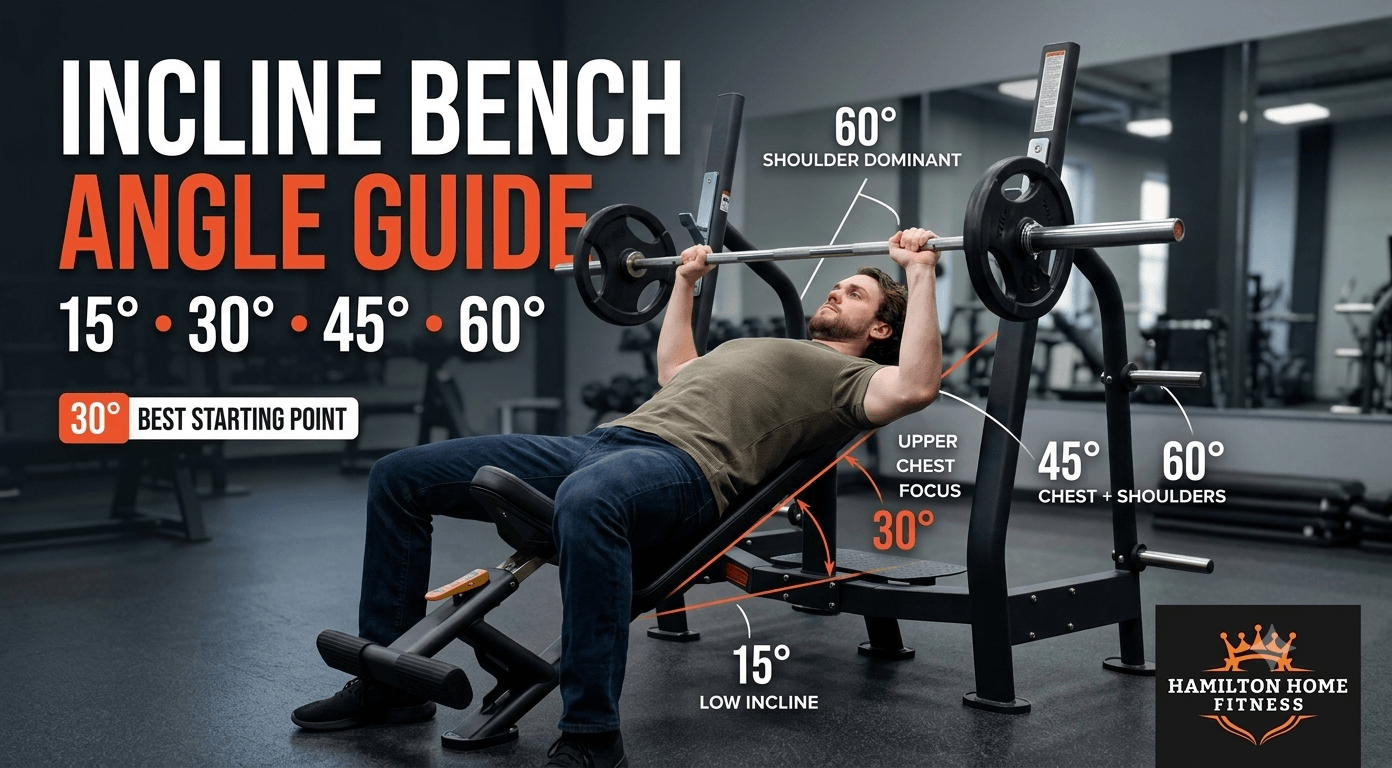
The useful window runs roughly 15 to 45 degrees. About 30 is the best-supported single setting, and the evidence is firmer about where that window closes than about where it peaks.
Below: the four angles compared, where chest work hands off to the shoulders; how to find the real angle on your own bench; and how many positions are worth paying for.
What angle builds the upper chest?
The upper chest responds best to a low-to-moderate incline—roughly 15 to 45 degrees, with about 30 degrees the most consistently supported single setting. Steeper is not better. Past roughly 45 degrees the front deltoid starts absorbing work the chest was doing, and pec output falls.
Raising the back pad tilts your pressing line upward. That loads the fibers running from your collarbone outward—the clavicular head, the upper slice of the chest—while the mid and lower fibers give up some of the work they carry on flat.
What the research actually supports
The 30-degree figure is a good starting point, not a settled law, and it is worth knowing why.
Studies that test several bench angles side by side do put upper-pec activity highest near 30 degrees, with front-delt activity climbing sharply once the bench passes 45°. Most of that work uses EMG—sensors that read electrical activity in a working muscle.
Activation is not growth, though. Some earlier research found incline pressing no better than flat for the clavicular head, and long-term data on real upper-chest growth is thin. Start at 30, then judge by where the window sits rather than chasing an exact number.
15, 30, 45, and 60 degrees compared
The practical split is simple: 15 and 30 keep the chest leading, 45 divides the work, and 60 hands it to the shoulders.
Angle | What it emphasizes | When it earns a slot |
15° | Barely off-flat, small upper-chest shift | Second pressing angle when flat already dominates |
30° | Strongest upper-chest bias, delts supporting | Your default incline working sets |
45° | Upper chest plus a real front-delt share | Chest-and-shoulder days, or a second incline |
60° | Front delts lead, chest output drops | Treat it as shoulder pressing, not chest work |
If flat pressing already fills your week, 15 degrees adds little that you aren't getting. If the top of your chest is the part lagging behind, 30 is the angle to build your working sets around—and 45 is the one to add second, not first.
Where chest work becomes shoulder work
Nothing switches over at a single degree—the handoff is gradual. But around 45 degrees is where front-delt involvement climbs steeply and the chest's share starts dropping. By 60, you are closer to a seated shoulder press than a chest exercise, whatever the bench is called.
The reason is arm position. As the pad rises, your upper arms travel further overhead relative to your torso, and that line belongs to the deltoid more than the pec.
Here is the check worth running in your next session. Your angle is the lowest setting that still leaves fatigue across the top of your chest rather than the front of your shoulder. If the front delts are the first thing sore the next morning, drop a position and press there for a few weeks.
That test beats any number on a chart, because it accounts for your shoulder width, arm length, and how you actually set up.
Setting your bench: ladder and seat
There is no universal mapping between ladder position and degrees. Position three on one bench is not position three on another, and no chart on the internet can tell you what yours is set to. You have to measure it.
Find your bench's real ladder angles
Put a phone with a level or inclinometer app flat on the back pad—that reading is your true angle, and it is often not the number you expected.
Run it once through every hole and write the numbers down. Most lifters find at least one setting sits well away from where they assumed it would.
The Body-Solid GFID71B shows why this matters. Its back padlocks at −15, 0, 25, 45, 60, and 80 degrees. There is no 30-degree stop on it at all — the nearest incline is 25, and the next step up is 45. A lifter told to "set it to 30" would be choosing between two angles that aren't 30.
That is one bench's ladder, not every bench's. Yours will have its own spacing, which is exactly the point.
Match the seat to the back pad
As the back pad gets steeper, gravity starts pulling you down the bench — and the seat pad is what stops it.
You have felt this if you have ever finished an incline set an inch lower than you started it. Set one, you're braced. Set three, your hips have crept forward, your shoulder blades have slid up the pad, and the last few reps are coming off your front delts.
The fix takes two seconds: raise the seat a position as the back pad steepens, then reset your shoulder blades before the first rep.
That only works if the seat moves independently of the back. Benches with independent seat and back adjustment let you brace the angle you chose; frames that tilt the back alone leave you managing the slide with leg drive for the whole set.
How many bench angles do you need?
Most lifters use four settings: flat, one low-to-moderate incline, one around 45 degrees, and something near vertical for shoulder work. Positions beyond that add spec-sheet appeal, not training value.
A seven-position ladder is not seven usable angles. Two or three of those holes sit between settings you'd never deliberately choose, and a couple sit past the point where the movement stops being chest work. Count the positions you would actually program, not the ones printed on the frame.
Trainers and small studios are the real exception. Serving a range of body sizes means finer steps and a wider seat range earn their keep, because one setting rarely fits every client.
For most home lifters, one frame covering flat, a working incline, a steeper incline, and near-vertical does the job on a single footprint. That is the case for browsing incline/decline weight benches—the angle range is the point, and the decline setting comes along with it.
A different reader is better served elsewhere. If you have already settled on incline pressing as a permanent staple and want a fixed, stable barbell station rather than adjustability, a dedicated Olympic incline station is a separate category—heavier, rated well past 1,000 pounds, with a spotter platform and its own bar catches. It is the wrong buy if you want angle variety and the right one if you don't.
FAQ
Should I use a barbell or dumbbells at steeper angles?
Dumbbells suit steeper settings better. Each arm finds its own path, which softens the fixed shoulder position a bar forces at a high incline. A barbell is the better pick at lower inclines, where you can load heavier and track progress cleanly from session to session.
What angle should I use if incline pressing bothers my shoulders?
Lower the angle first — a shallower incline reduces the overhead-style shoulder position that steeper settings create. Then check the basics: that you are not sliding forward and that your shoulder blades are set before the first rep. If the discomfort persists, or you feel it in the joint rather than the muscle, stop the movement and see a qualified professional before training through it.
Is the incline bench harder than the flat bench?
Most lifters press less at an incline, and that is normal. The angle shortens your leverage and takes away most of your leg drive. Expect a lower working weight, and judge progress against your own incline numbers rather than your flat bench.
Should beginners do the incline bench press?
Yes, though it does not have to be the first pressing lift you learn. A shallow-to-moderate incline is easy to set up and safe to learn with dumbbells. Get comfortable pressing flat first, then add an incline angle once upper-chest work becomes a priority.
Final thoughts
You now know the window, where it closes, how to read your own bench, and how many positions are worth paying for.
The takeaway is small enough to carry into your next session: the number that matters is the lowest angle that still fatigues the top of your chest—and most benches will not label it for you.
Once the angle question is settled, what's left is a specification question about how the bench is built. Those are the pad, frame, and capacity checks before you order.